Showing posts with label Crafting. Show all posts

Thursday, March 10, 2016

Purim is coming: DIY Costume!

I realize that Purim is only a little over 10 days away.  Under two weeks.  The title of my post must seem a bit impossible to you.  Purim is so so so close and you think I still have time to MAKE a costume.  Yes, yes I do.

Perhaps you go to a more conservative or orthodox synangogue.  Perhaps your daughter goes to a Jewish preschool that prefers their Purim to be purimy...not halloweeney.  Maybe you want your daughter to be Queen Esther, not dressed like Queen Elsa.  If that's true, then here is the answer for you- the Peasant Dress.  Easy to make, minimal or no sewing required.  In fact I have personally made two of these dresses inside of one evening after the kiddos went to bed.  I believe that you can to!

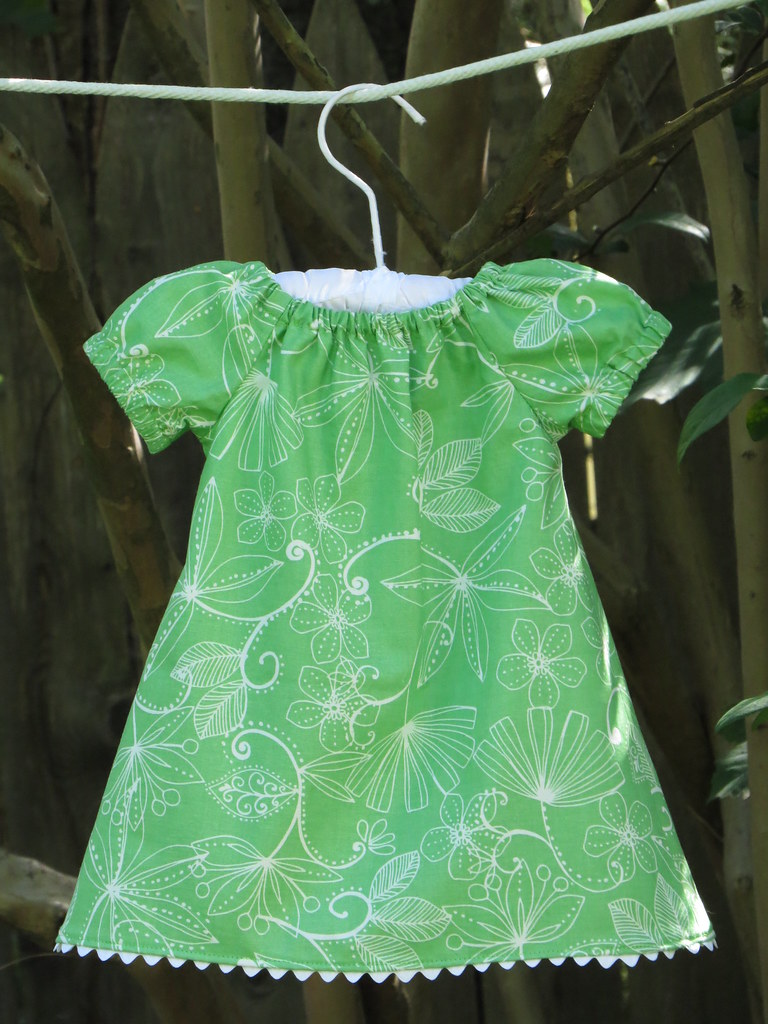
The first thing we need to know is what's a peasant dress.  It's a super simple dress not that far from the pillowcase dress. It has a gathered neckline and gathered sleeves, meaning that you make it out of basically a square and then use some elastic to make the neckline fit.

Here are some images of the ones I made for my kiddos.  The bright yellow tie and purple tie on the front is literally a shoelace from her lacing card kit.  In these cases I made these out of super simple fabric that was around, literally out of sheets.  Then I had them put over little vests that I made two.


Here are a few excellent tutorials on how to make them.  Since such great tutorials exist, I don't really think I need to write out another one.

Tutorial Number 1: Scattered Thoughts of a Crafty Mom
Tutorial Number 2: Once Upon a Sewing Machine
Tutorial Number 3: Sew like my Mom

For all of these tutorials you can easily use Iron seam tape.  Just make sure you buy the really good stuff that's totally permanent and spend a long time with the iron.  I also suggest that you take a blouse or a non-cotton shirt that is large on your child and use that as a base.  It can sometimes be much simpler than printing out the pattern.  You aren't making a dress forever, it's just for a day of fun.  If you want to make a super simple bodice, just use that hem tape to add a fancy ribbon.  You could even just tie it around the waist.   Here's a quick tutorial for a vest:

Tutorial Number 1- 8: All Free Sewing
Tutorial Number 9: One Moms Daily Drama

If you aren't up for making the vest just pair the Peasant dress with a skirt and an apron.  YOU CAN DO IT MAMA!


Top Photo: Stitched By Sara

Monday, May 18, 2015

Shavuot- Crafts for Kiddos

Wow- it's already time for Shavuot!  This year it coincides with Memorial Day weekend, which can make it an even more exciting holiday for all of us.

The holiday of Shavuot is celebrating that giving of the Torah to on Mt. Sinai.  The official moment when the ten commandments were given to the Jews of the world.  There is a precept that all Jewish souls that were ever going to be on earth were present when the 10 commandments were given.

In temples and congregations around the United States people everywhere are perfecting their cheesecake and blintz recipes.  It's the moment for the ice cream party of all ice cream parties, and while that's awesome, it's not exactly what I want my children to focus on when it comes time for Shavuot.

So, to celebrate the more religious aspect of the holiday, I present to you this 10 commandment craft for the kiddos:

Step 1:  Get one piece of white card stock for each child that will be doing a project.  I chose 12x12, but 8.5x11 is totally fine.  12x12 is scrap booking paper and I have a ton of it hanging around the house.


Step 2: Allow each child to choose one paint color- brush on hand to cover all the palm print.  Apply hand to paper.  Repeat with the second hand.


 Step 3:  Read off childs version of the 10 commandments, and assign each finger to a commandment.  In this case I also let EG choose which color pen I should use for each finger.  She really enjoyed that part.


The commandments for kiddos are very close to what they are in the Torah, except a bit simpler to explain and understand.

1. There is only one G-d
2. We should not make pretend G-ds
3. G-ds name is special
4. Remember Shabbat is a day to rest and say thank you.
5. Listen to your parents and take care of them
6. Do not hurt people
7. Love and look after everyone in your family
8. Do not take things that belong to other people
9. Do not say things that aren't true
10. Be happy with what you have.

I really like this version, because its simple and it re-enforces things that we want EG to do anyways.

I will be framing this and putting it up on EG's wall, a constant reminder of the top 10 commandments from G-d.

Do you have any shavuot crafts you'll be doing?

Monday, March 2, 2015

Mishloach Manot- The Toddler Edition with the Mishloach Manot Wars

Yesterday we talked about the Mitzvot of Purim, but I want to delve deeper into what you can do to keep your toddler involved in the Mishloach Manot.

I was reading through my daily edition of Tablet magazine, and what should be on the forefront of my pages- the Mishloach Manot Wars.  I can't even believe that someone wrote that.

Because I don't have enough to worry about, that I need to think about outdoing someone with my basket of nice treats.  Because giving the treat isn't enough, it has to be better than yours?

Maybe I'm just not the in the right circles, but the idea of anxiety related to making these baskets and gift bags seems a bit ridiculous to me.  Then again, I think about all the time I can spent on Pinterest, looking at the cute and adorable things that other people make.

There are four mitzvot of Purim, and I think that this one is probably the least of all the four.  Hearing the megillah is certainly of more importance.  So is giving charity to the poor.  

So, when I think about doing these baskets, I think about ways that I can have my children participate.  It might be a little more difficult for Ocho, but EG, she can help in so many ways.   Now, they might not turn out like Martha Stewart.  But they will be fun for us to make, and, I hope, enjoyable for our friends and neighbors to take part in.  So here's to having the family participate, and to lessening any crazy expectations we have on ourselves.  

When I think about putting together my gifts, the first thing that I think about is allowing EG to decorate the bags for me.  Some crayon, pencils, maybe even a handprint.  Want to make them even nicer after the kiddos handiwork?  Print this lovely Shalom onto them courtesy of Chai and Home.

Next I think it's a great opportunity to help your kids count.  I usually try to put in two Hamentaschen per person in the family.  This might seem like a lot (here's looking at you sister-in-law) but no one wants to be the person who only gets one cookie.  In addition to cookies I like to put in something more healthy.   

There is a tradition to put in wine or grape juice, since wine is so important to Jewish joy. However, with most of my gifts going to those with kiddos, I prefer to send raisins.  I usually throw in a few cuties, and a few apples too, so everyone can get something.  Have them count out how many cookies, cuties and apples into each bag- learning and doing!

It's traditional, and some opinions hold part of the mitzvah, to have the packages delivered by someone else.  This is a great way for your toddler to participate.  Since they have to be delivered during the day it's a great opportunity for your child to practice front door etiquette- ringing the bell or knocking on the door, giving something away, and saying goodbye.  Also a nice opportunity to loosen the reins a bit and let them walk to the neighbors house alone (observed by you from the front door)

How do you involve the kiddos in the mitzvot?  Or are you stressing about theming your baskets appropriately?  Don't even get me started on whether it's okay for me to give away cookies my toddler helps me bake...

Monday, February 23, 2015

An Easy Purim Craft

Sometimes I don't have time to do something crazy creative for the holidays. Especially for Purim, when it feels like I honestly have just finally put away everything from Halloween and Chanukah just yesterday. (No, seriously, I found another dreidel inside the couch!).

So here is something that almost every Mom (or Dad, or Grandparent!) can put together in about 5 minutes to engage the kiddos in the Purim Story.  It requires so little, I'm almost willing to bet you $5 that you have these items at your house- or something similar that would work really well.

Supplies:
1 piece of card stock like paper
1 straw or handle (Popsicle stick? plastic knife?)
1 pen
1 pair of scissors
Crayons or markers for coloring

To Do:

  1. Draw a simple sketch of a Queen Vashti, Queen Esther, Mordechai or Haman.  EG chose Queen Esther.

  1. Cut out the drawing, around the basic face.
  2. Let the kiddos color to their hearts content (EG colored both sides)
  1. Cut out the eyes
  2. Attach the handle
  3. Play!


Not into making your own drawing?  Print out this printable crown from Chai and Home- what cute little Hamentaschen!

Sunday, February 15, 2015

Happy Valentines Day- Crafts for the Kiddos

Ah Valentines Day.  A nebulous historically Christian holiday whose current form is so far from it's religious traditions we're tempted to call it an American Holiday.  With it being on Saturday night this year, the hallmarkism of America went into overdrive. What better time to brave the crazy crowds at a restaurant then this hallow of forced love...

We didn't celebrate Valentines Day yesterday. We sang Shabbat songs and enjoyed time as a family, as we do most Shabbats.  They don't celebrate it in EG's school, but never-the-less, there are a few crafts that I think are PERFECT for the holiday that we did do...

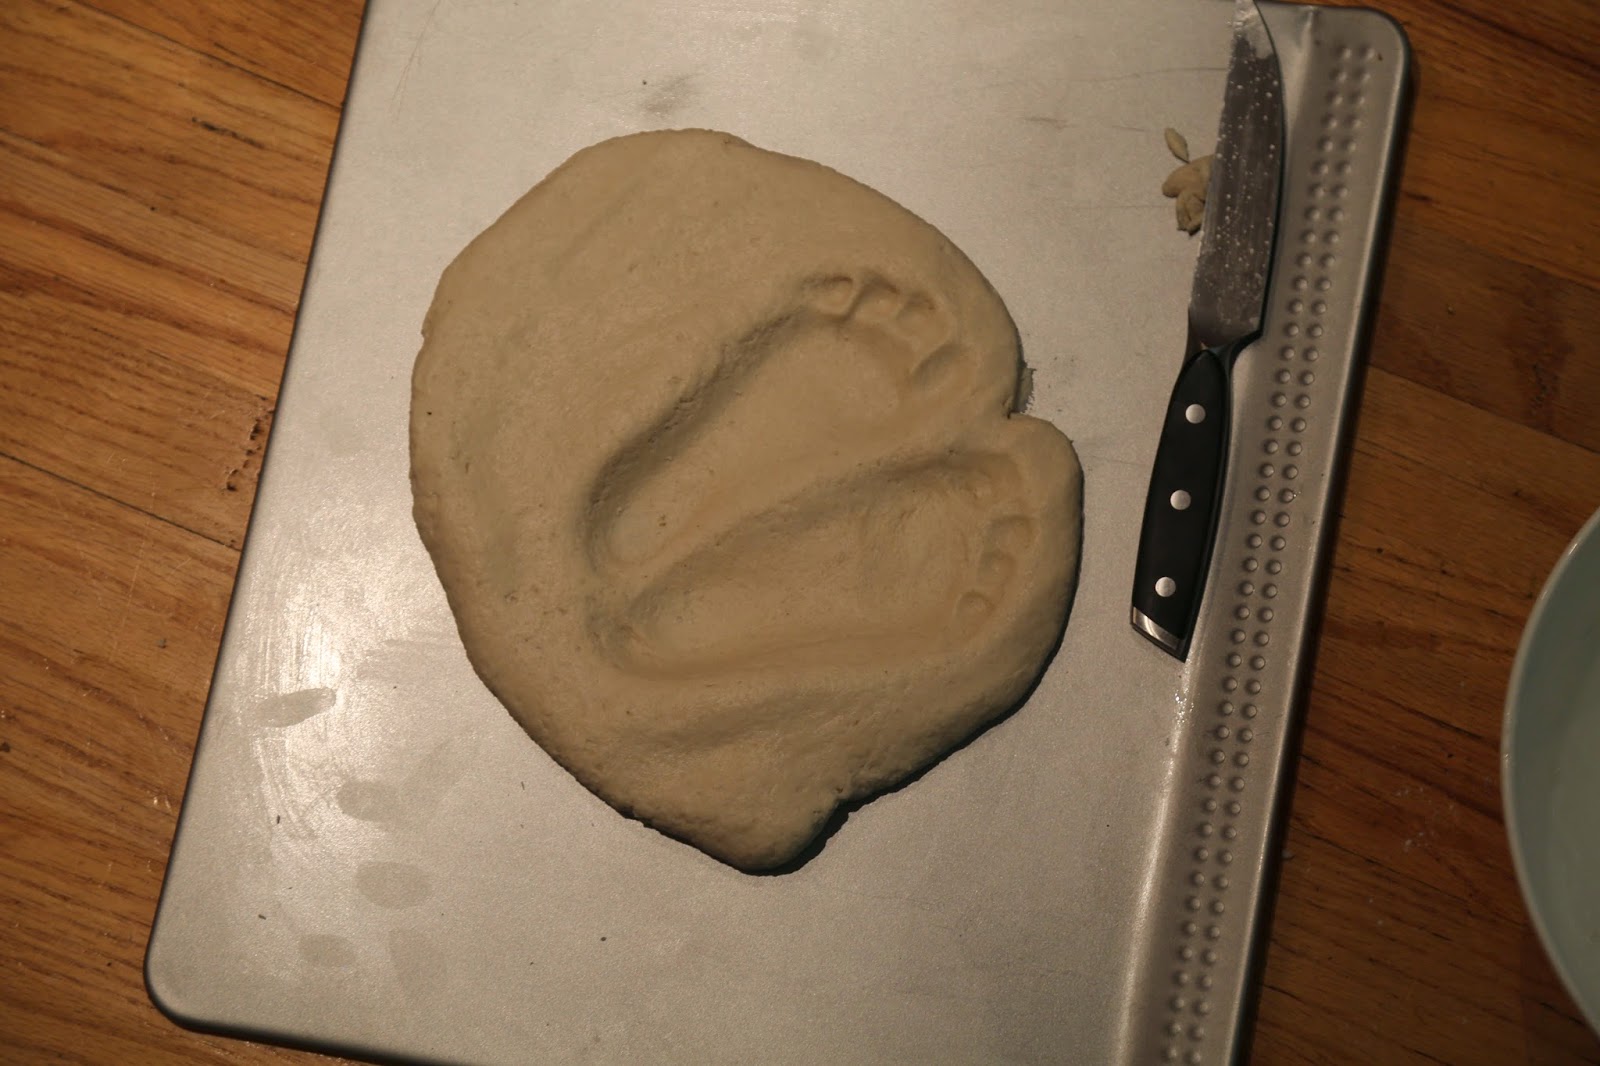
SALT DOUGH FOOTPRINTS:

This is a great little thing to do, and I love the idea of making hearts every year to see how the girls have grown.  Sort of like making Christmas ornaments, but not quite as Christian, just fun and nice, and something I can display and they can have as keepsakes.


Recipe:
1 cup salt
2 cups flour
about 1 cup water

Make it into a nice dough, then roll it out or pat it down.  Have the kiddos step into the dough, then cut around it to make a cute heart shape.  You can try to get a bit more of a heart shape out of the feet, but I found that too difficult for me to really do.  Dry overnight, then put in the oven on warm while it dries out.  I think I might paint them once it's dry, and I'll definitely add the date and ages of the kiddos.

This dough is great and easy, and also not something toxic, so totally good for Ocho too!

Here's EG's after she stepped in it....

 And little Ocho feet- this was fun to do, but also really difficult.  I had to have EG distract Ocho with a toy so she wouldn't press her feet into the ground to much. Even like this, it's a bit hard.


The next project is one that we actually did for a Christmas present, but I thought I would finally share it here, since it's perfect for this holiday.  I got the idea from my sister, but it was so much fun making it myself.

The hand is EG's and the footprints are Ochos.  I love that it's both girls together, and though it was a bit hard to get them nice, it turned out really well!  I also LOVE that EG's handprint has a mini heart inside too!

Directions:
Buy a canvas- I recommend at least 8x10
Get washable fingerpainting paints
Paint onto one hand, press onto canvas
Paint onto one foot at a time, then press onto canvas.

I recommend letting each image dry before adding the next one.

Then just add the "L" and the "E".   So easy and so cute!


The last one is a glitter fest!  EG loves to give hugs and high fives, so this was a 'virtual' hug with her hands that she made.  Then we painted on some glue and made each of her handprints a different glitter color.

Again, doing this project yearly also lets you see how the kiddos grow!

Hope you enjoy these fun projects!


Monday, February 2, 2015

Tu B'Shvat Tablescapes

I'm not the most fancy when it comes to table decor.  As much as I try, I don't think I'm ever quite able to get across what it is I'm trying to.


You've seen my Passover table, and I've had some pretty Rosh Hashana tables, and I've done my best on Purim too, but I get so involved in the practical- especially when you have little children and tiny hands on the table.

This Wednesday is Tu'Bshvat, and while we won't be hosting our dinner until Saturday night, I thought I would share a few beautiful tables, so we can all strive for something new this year...

License
Attribution Some rights reserved by Didriks
There are so many beautiful tables designs at Chai and Home.  She even has a whole pinterest page dedicated to these gorgeous tables.

I love the idea of using a platter and displaying some of the fruits and vegetables of the season, or of the holidays...


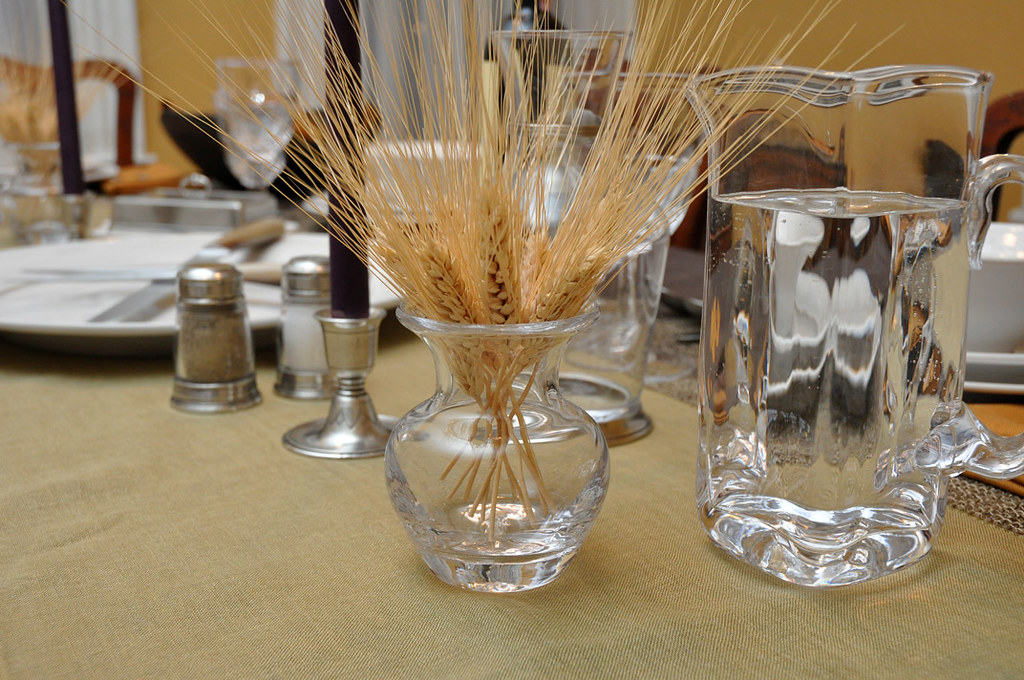
 This shows how gorgeous Wheat can be in a vase- and totally simple too...

Also cc  Didriks
The Jewish Hostess also has some nice tablescapes, so you can look at her website too for some additional inspiration.  Just because we have tiny humans doesn't mean we don't want pretty things... right...?


Monday, January 26, 2015

Organizing Photos for Keeps

I've posted about Project Life before, but I wanted to write about it again, to help ensure that your children don't end up with what I have in my garage...a large pile of pictures without context or thought.


Yup- those are adorable pictures of me as a youngin... Unfortunately, they have no rhyme or reason to them.  Collected for years in one drawer, or box- one place or another.

Do you have to use Project Life to display or organize your photos...no, but I do think it's easy and totally worth it.  But lets take a step back.  Let's look at how you get those photos off of your phones, off of your computers and make them accessible to anyone.

The first step to printing and organizing photos- to having your children's life made accessible to them and others is to download monthly and organize digitally.  My recommendation is to start here.

Step 1: Make a folder on your computer- label it this year 2015

Step 2: Inside that folder make a 01-2015 folder.

Step 3: Download all the photos into that folder the first week of February.

Step 4: Repeat steps 2-3 on March 1st, and do on through the year.

It's that simple.  Knowing when a photo was taken will dramatically improve your ability to know what was going on, and to have recall about the event.  I know it seems strange, but this is especially true about those little moments.  When did the baby first sit-up?  Crawl?  Walk?  Knowing what month these events happened in can really make the difference between being able to write about your child or not.

Want to take it a step farther?  Inside of the monthly folders include additional folders with the events labeled.  Like "Family Picnic to Alondra Park- Date" or "Wedding of Greg and Rachel- May 4th".  That way you have the basics, and the photos can provide the details.

What we do in our family is put all our photos onto an external hard drive.  This makes it easy to take with us to friends or family- to give them their photos, as well as to grab in case of a fire. As much as I love my Project Life albums (and I do!) they are a bit heavy.  By grabbing the hard drive I ensure that we get all the photos and everything out of the house.

Still think its too much? 

I think one of the best things we can give to our children is their own memories.  My sister's memories are strong, but mine are not.  This way I can help make sure that both EG and Ocho have not only their memories, but the images that go along with them.  That they can look through them and see the people we've lost, and remember.

Tuesday, November 25, 2014

Thanksgiving Crafts and Traditions

Thanksgiving is coming up next week, and it's a wonderful holiday.  With the December Dilemma around the corner, I like to make a big deal about Thanksgiving.  As an American it's a wonderful story about the founding of our country, and about overcoming the long shot odds.

Both of my girls got to participate in craft projects this holiday season.  EG did her project at school, which I absolutely love.  It's simple, easy to do, and a 2-year old is perfect at being able to do the project and keep their hand print nice.

I could totally see doing this, and them making it into a nice photo frame to put a Thanksgiving portrait in.  My family always used to do family photos over Thanksgiving. At my cousin Lezlie's house we would all gather up the stairs, and my dad would take the photo.  It's nice to have those photos through the years, and it would be cool to do a photo frame with the kiddos prints to hold them.


Yes, I know, EG's face isn't looking too good.  She keeps picking at her boo-boos. Moving right along...

Ocho's project was done at her school too.  Okay,fine, at her Mommy and me class. But still, it's also something you could do at home.  We started with stamping the hand and footprint, then cut them out and made a turkey.  You can get better directions here...


Here it is with just the footprints and the hand prints.  I think it might have turned out more turkey'ish if I had only used one foot, rather than two, or if I had turned them the other way, so the feet come together, rather than apart.


Here she is all done up- with a beak, some eyes and a waddle.  I'm going to put this in Ocho's portfolio, but if you were hosting thanksgiving you could also have your child make different ones for each person, attach them to toilet paper rolls and use them as name places.  Or as part of the centerpiece.

The other Thanksgiving tradition I'm about to start is to change up how we say we're thankful around the table.  My teacher in Ocho's class gave me this idea, which is to use M&M's.  People pick an M&M or two, and then they have to be thankful for something which corresponds to the color of the candy.

Red- Serendipity (this is probably the hardest)
Blue- People
Green- Things
Yellow- Funny things
Orange- Adventures
Brown- Places

We went around the room and shared one or two each in class.  Here's what I'll share here on my blog.

Red- I'm thankful for the serendipity of my neighbors Joe and Michelle and their kids.  They have shared a lot with us, and I'm thankful that they are there (most of the time, wink wink)

Blue- I'm thankful for my family- which is what people usually say on Thanksgiving.  But this year I'm extra thankful for my Dad, my sister, my in-laws.  Having lost my mom, having them means so much more.

Green- I'm thankful for my scrapbooks and my photos.  I'm thankful that I'm making some sort of order for my kiddos, but also thankful for all the ones my mom kept in a drawer.  It's even more important to have these mementos now.

Yellow- I'm thankful for 2-year-old Amelia Bedelia-like EG.  Yesterday we were learning about baseball with her baseball set.  I told her to swing the bat.  She ran over to the swing hanging from the tree, put her bat on it, and swung it.  Love that girlie!

Orange- I'm thankful for our camping trip when my mom died.  As I mentioned earlier, I had to be somewhere, and I'm glad I was there.

Brown- I'm thankful for EG's school, Growing Garden.  It's a safe, warm, loving environment that she's been growing-up in for over two-years now.

What about you?  What are you thankful for?  Care to take a virtual M&M?

Thursday, November 13, 2014

Wrapping Paper project

My mom didn't believe in wrapping paper- at least not in the traditional sense of the word.  She used to give me cards that she hadn't signed, and when she arrived at Ocho's party the week she died she was so proud of presenting the present to me in a bag she had actually bought.  (if you got a gift from my mom, it was likely put in a bag you had already given her once).

So it's sort of funny that I'm a touch obsessed with gift wrapping.  When I say a touch, I have tons of bows and twine and ribbon.  I love the look of a nicely wrapped present- it's quite nice to be a part of my husbands family- since they invest in similar things.

Since EG loves to do all sorts of art projects, I decided to make something special and unique for this year's holiday season- hand made wrapping paper.


 One Sunday morning, while Ocho napped and Daddy took a breather I set us all up.  A long roll of white paper (this one from Ikea, but available at almost all the kiddo and craft stores) taped to the walkway of our front yard.

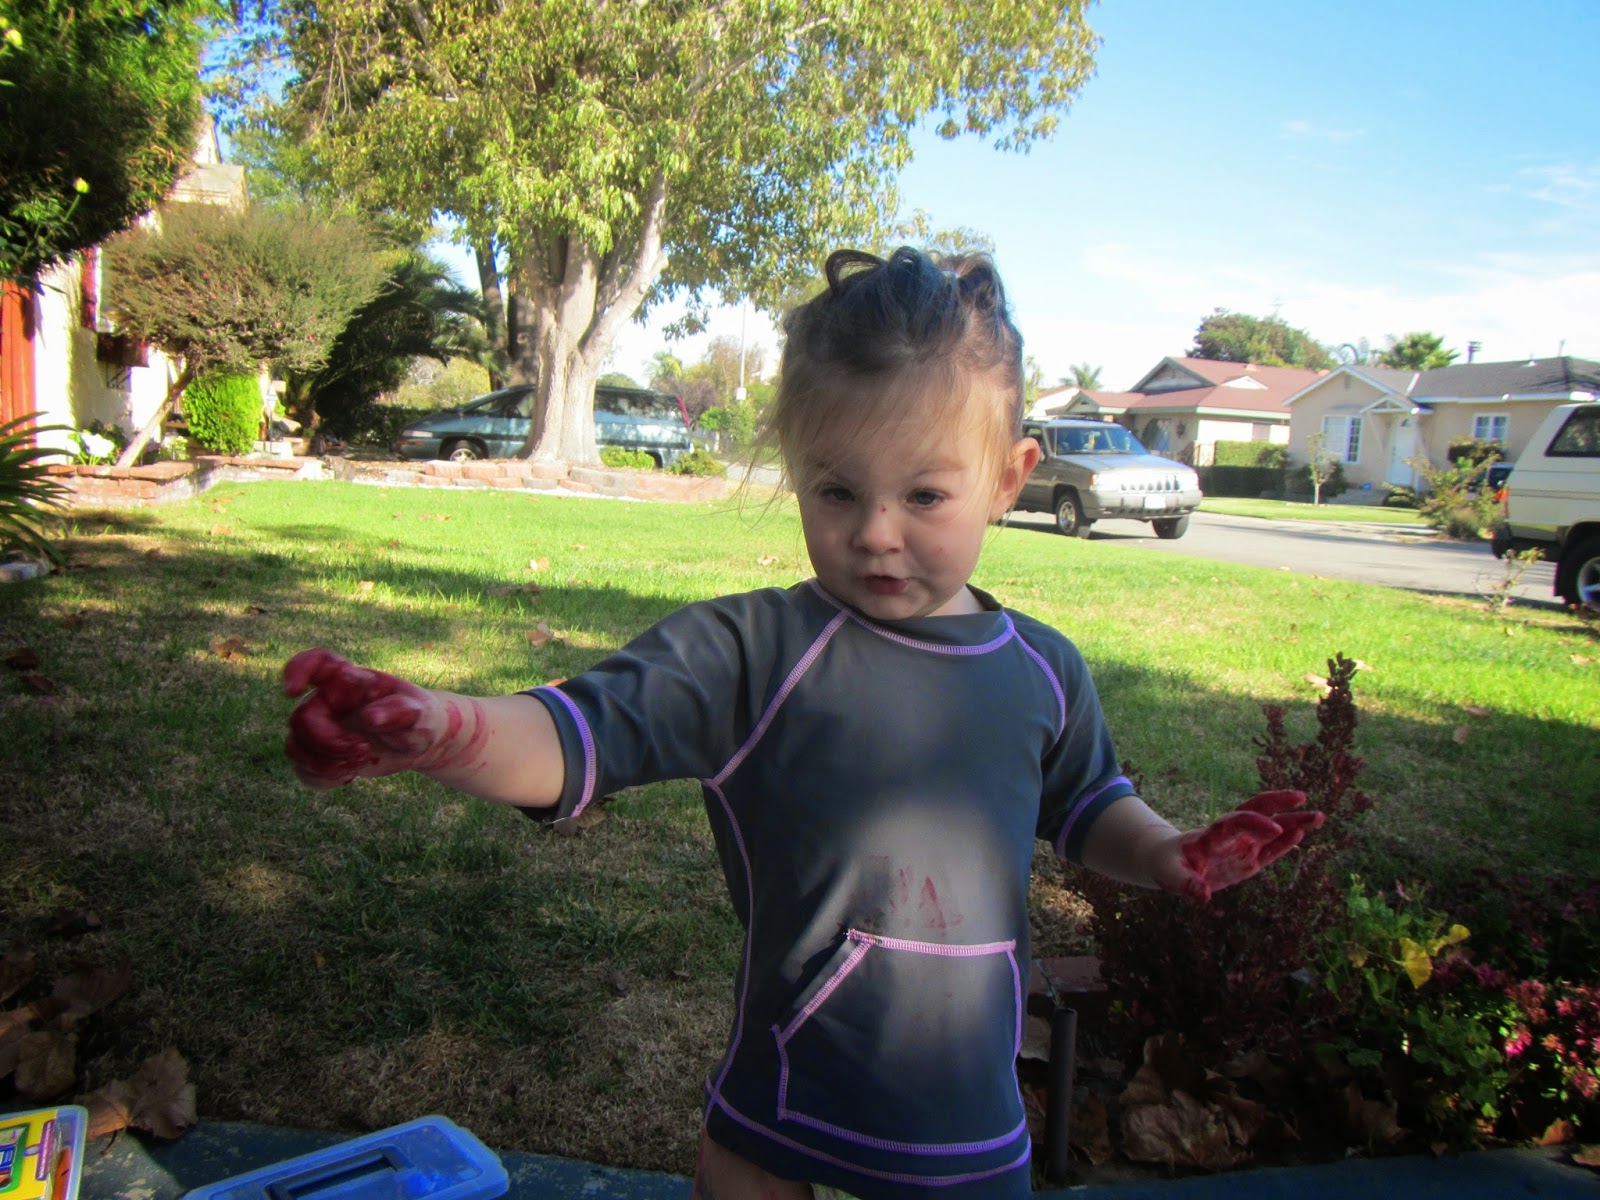
Washable finger paints (thanks Tanner!) and a place mat for her to put her feet on.  I'd been doing this for a while, but I'd never let her walk on the paper before, it was always just a bit of coloring here and there on the same paper.


Boy did we have fun.  EG is completely into it- totally messy and of course wanted Mommy to help too.  I would pick her up, put her down and help her make nice footprints.  We did at least three sections of paper this long.


 Biggest challenge- to much paint on her feet and slipping. It was a bit difficult to get enough paint to have fun, but not to much to be slippery.  Add that to an occasional gust of wind off the ocean, and it could be a bit of a challenge.

Then of course, it was a touch hard to dry.  Lots of saturated paint, and so I was trying to lay it out in the sun so she could keep painting.  It ended up ripping off the roll, which isn't a bad thing.


As you can see she's wearing a bathing suit top.  I misjudged how messy everything would be and we started out the painting in her regular clothing. While the paint said ultra washable, it still took two washes and a stain remover to get the dress back to normal.  But this bathing suit from Hanna Anderson held up great, is SPF 50 and made clean-up super easy; just let her jump straight on into water play!


If you'll be getting a gift from us, maybe you'll luck into some handmade wrapping paper from EG.  If not, don't think that you're not loved- we just haven't made that much.

This is a great project for anytime of the year, and if you keep with crayons/markers, etc then it would even be easier.  Can't think of a nicer way to involve the kiddos in all the gift giving coming up in a few weeks.

Are you ready of the holidays?

Thursday, July 17, 2014

Minor Projects

I've been busy working on lots of little things around the house- you know what I'm talking about, those little projects that you've had on the list for a while, but never seem to get quite done.  Since I've been basically just sitting on the couch daily (between groin pain and indegestion, it's been a rough week 41) so these little projects have really helped me through it.

The first project I'm going to show you is actually a wall calendar I made for everyone for Christmas/Chanukah.  I made one for my mom, sister, mother-in-law and sister-in-law.  It's a really easy and fun project, and can include any kind of celebration you'd like.  I really like that it's interactive, so it's so much easier than looking through a book to remember important dates.

There are really only two components.  The first is the plaque sign, which I've decorated with the word CELEBRATE.  For my SIL I made it blue and white, for my mom it's white and black.  My MIL got one that was more natural colored.  You can do anything you want- some people just put Birthdays- but my plan is to add anniversaries at some point...

 You can buy the piece at Michaels or Jo-Anns, and it's not that expensive.

Then there are the circles- I bought a TON of them on Amazon. These are about 1.5" wide, which I found to be perfect.  With them there's enough space to write the names, and the date, and still have it look really good.

Then you need these little metal rings to connect the discs together.  These are really easy to get, and pretty cheap.


I drilled a small hole in the top and bottom of each disc, so I could attach them together.

Here's the final product:


The other thing that I've been working on is a small spot to put my jewelry in the bathroom.  I don't know about you, but I take my jewelry off before I take a shower.  Even if I don't take a shower, I almost always get undressed in the bathroom, that's where the laundry basket is, isn't it? 

So I took an old shelf that I've had since college and added a few open rings for the necklaces to hang off of.  It looks great for the hanging section- and I'm totally happier with the space I've gain back on the counter-top.

I think I need to add a little bowl or some type of small item on the top of the shelf for rings, and earrings, but it's been working really well so far!  easy peasy project!


Tuesday, July 1, 2014

New changing table-

My Mother-in-Law was the first to suggest that we move our changing table into the hallway for when B2 arrives.  Being in a basically one-story house we almost always take EG to her bedroom to change her.  I expect that once B2 is done pooping in the night, we'll do the same for them as well.  So when she suggested we would want the changing table always accessible, I knew it was a great idea.

Unfortunately the space that made the most sense- outside our guest/kids bathroom- is a really tiny space/hallway.  We'd had a dresser/secretaries desk there and that might have worked, but when we fold out the top it would be impossible to move, and I didn't want to constantly think about where to move the changing pad.

Months of searching later I found the perfect dresser- in our own bedroom!  I had gotten to my wits ends about this dresser, and then realized that the one we had would already work.  I wanted two top drawers (diapers for EG and diapers for B2) and then at least two other drawers (PJs for each kid).  I imagined that we would do bath time, take each kid into the hallway to diaper and dress for the nighttime, then we would head off to bed time routine.

Once I found the dresser I started really thinking about what it would look like.  I loved the look of these drawer pulls:

Pottery Barn drawer pulls
 They would be great to number each drawer and then I could tell EG which drawer and we could practice her numbers.  Wonderful and easy.  Except they are discontinued.

Back to the drawing board.... I saw these dinosaur drawer pulls:

This is from the Misadventures of the WolfPack, and they have an excellent tutorial on how to accomplish this look that they created for their little boys.   However, being pregnant myself and having put more than enough on Working Dad's plate, I just knew the foam would be too much for us.

Enter EG's Melissa and Doug puzzle:

I realized that these would be the most adorable drawer pulls- perfect for what we were going for.  And each animal has a distinct color, so we could practice animals and colors at the same time!

I knew that it would be the most adorable item- if I could pull it off.

When I went through the process of this dresser I took photos of just about every step that I made along the way.  However, when push came to assembly shove, it didn't work the way I expected it to.  So, I don't want to share with you in great detail what I did, because I would NEVER recommend it.

We started off with a plain brown dresser, and had to trim down the legs just a bit to make it the right height for our changing table. I love the look of white and wood, and I knew that would help the drawer pulls to 'pop' so I painted the drawers white.  I really like that look.

Then it came time to figure out the pulls themselves.  I know how regular pulls are- they have a metal nut or screw base inside, and get screwed into the drawer.  I thought that I wanted to be able to replace the pulls if I needed to, so I began heading that direction.

Basically I drilled out a hole the size of a nut, bought myself a specific type of screw that has a screw on one side, and a bolt end on the other.  I thought these would be perfect- use wood glue to keep in the nut, screw in the bolt end (with a spacer around it to make it pretty) and then screw into the wood.

What a disaster!  The particleboard the puzzle pieces are made out of weren't hard enough to hold the screw in.  Almost all of them totally broke apart.  I was able to fix them using epoxy, but if I were going to recommend how to do this, do it backwards.  Same hanger bolts, but screw into the puzzle directly, then bolt into the dresser.

No matter, the finished product is AMAZING! (or at least I think it is)... (ignore the stuff on the top, we're trying to get it all ready for B2- which is challenging when you only manage to get a day or two of good work done before you injure yourself again!)


I left the lion on the left, since that is where we normally went for EG's diapers in her bedroom changing table, and one of her first little things was an adorable roar/growl that her dad taught her.  I chose the other puzzle pieces based upon their look and their ease of use as a pull.

It took WAY to long to get this project done, but I'm thrilled.  Now all I have to do is get a new changing pad, and set-up the accessories we'll need in the area- aka creams, wipes, etc.  The top of this table isn't as large or wide as our old one, so I'm planning to hang those items on the wall.


Did you make any furniture yourself for the babies room?  We've been working on moving a LOT of stuff since we turned the guest bedroom into B2's room.

Later this week I'll share the progress (or lack thereof) on B2's room, as well as a few of the other house related projects we've been tackling lately.


Thursday, May 8, 2014

Bedroom for B2

Now that my sister has come and gone we've started to really turn our attention to the new babies room.  We're going with a Noah's Ark theme, since Working Dad's grandmother collected them, and we have about 6 or 8 that we can display.  I like the theme, it works well in our house, and sort of compliments EG's Hot Air Balloon theme. 

Here's the mood board I created.  This is my first time creating one, so don't judge me to harshly:

I've already bought the wallpaper, which is Element by Graham and Brown.  It wasn't too expensive, and we'll be mounting it horizontally to make it like an ocean wave.  I'm planning to mount all the arks around the water, with the animals inside.  There will be at least two that the children can play with, most likely a playmobile wooden one, then there are a few puzzely wooden ones from Grandma's collection.

We're using the crib we have from EG's room, once we get her toddler bed.  She's not crawling out of the bed yet, so we're planning to put in the toddler bed and try taking naps on it before moving over for nightime.

The dresser is the big piece that I haven't found yet.  The one in the mood board is from Pottery Barn and is over $1000, so I don't think we'll get that one.  I've been looking on Craigslist, and hope to find one cheaply.  I'm planning to do magnetic paint on the end sides, and maybe do a rainbow in the middle of the closet space.  The closet in the babies room has lots of storage and things that can't move, so I'm pretty much planning to block it off.

I love these bamboo blinds.  I think I can use them decoratively, and then add a total light blocking curtain behind them.  This image is from Young House Love.  I also LOVED their little octopus hanging item- I picked that up from Target.

The only thing I haven't been able to buy/find is the rocking chair I want.  The one in this image is from Target's Eddie Bauer line, but they don't make it anymore.  They sell one by Little Castle, but I don't really like it and it's really expensive.

Oh well- what do you think about B2's room?  I'll update you as we make some progress!

Wednesday, May 7, 2014

Project Life Album Making


I already talked about the wonderful first year baby book that I've started (and almost finished!) for EG.  The giveaway is still open through Thursday, so feel free to enter that still.

However, even with all those wonderful pages, there are still plenty of things that I didn't get to include in that book.  Not all the holidays were represented (no 4th of july!) and anyways it only goes through year one with holidays or stories. 

I've been a scrapbooker for quite some time.  I did my first book when I was in high school, and have even made gifts of books for my parents and my sister.  However, since having EG it's been really hard to continue to scrapbook.  It tends to take a lot of time, a lot of space and a lot of materials to get things done.  We have a tiny house, and though I had the guest bedroom as my office/crafting space I was never in it.  Once EG goes to bed there is laundry and dishes, not to mention a few minutes/hours with Working Dad before hitting the hay. 

Enter Project Life by Becky Higgins.   It's a scrapbooking/journaling/album system that works without you cutting photos, and is super easy to use.  So far, I've found it to be incredible, and I wanted to share with you a few of the pages that I've worked on.

The books are bit larger than the typical 12x12 size, but they fit 12x12 pages as well.
I only bought all the items two weeks ago, and have only spent 1-2 hours a night for about 5 nights on everything you see here.  That tells you how quickly you can work on a Project Life album.  I was initially really hesitant to use the system, because I didn't think that I would be able to add all the personality and the items that are special to me (in scrapbooking I keep everything from ticket stubs to maps and use those in my books) but I've found myself able to include lots of the things I used to in my regular books.


I started with my baby showers.  Even though these are in EG's first year book, there were tons more photos, and momentos that didn't fit.  I had them slipped inbetween the pages of the Pearhead book, but anytime that she or anyone else wanted to look through it was worried these items would get lost.  This whole page took me about 5 minutes.

The system is simple. It's a big binder, a few page protectors (she has like 12 different styles) a 'core kit' of little note cards and your photos:
 There are other companies that produce items that fit inside the pockets as well, and I've really enjoyed some of the products by WeR Memory keepers. They sell the little cards and a lot of them are really, really neat. 

As you can see below it's still easy to include items that you've collected.   I cut up some of my cards, included whole cards in a 5x7 little sleeve, and the list of who gave me what in an 8x11 sleeve. 


I used a regular scrapbooking page to add some of the cards we received.  You can pull out the page and open each of the cards, so we can always see what people said about the coming baby. 

Journaling is a big thing in Project Life.  I love that they make the cards nice and easy to write on, but I don't love my handwriting.  I'm going to have to get better at my penmanship, but I know that when EG is older, she won't care what my handwriting looked like- she'll just care that I wrote so much down!
The larger 4x6 cards some with cute sayings on them, or are more like title pages like on the top left.  They make it really easy to add cute and meaningful sentiments and just round out the images. 

When I was making this album I had bought myself the baby girl package by both We R Memory and by Becky Higgins (she calls them project packs I think), and it's so nice and easy to add the details.  They have little cards that say everything from "1 month" to "I Heart Tummy Time" and everything in between. 


I was able to add in my birth plan, and EG's hospital bracelet to the mix as well.  I've kept all these items, I might as well use them!  I also have her first hat and her baby blanket that she was wrapped up in.  I might make a box for her items, but I could also cut a scrap of the blanket and put it in one of the pocket folders they have. 

I hope seeing how easy this is has inspired you to take the jump.  It's versatile, easy, and a nice compromise between scrapbooking and traditional albums.  I also love that none of the pictures have been touched or hurt, they aren't stuck to anything, so you don't have to worry about not being able to remove them.  It would be so easy to take out any photos that get damaged, or to take them out to make copies of them.

Now that I've started, I'm hoping to finish and get 'current' before the baby comes.  I've got at least 5-6 other albums that I want to work on (here's to getting all our wedding into a scrapbook!) but at least I'll feel good about moving forward.  That's one of the things that Project Life is so great about- less guilt!  Just put them in the sleeves, add a few cards, jot a quick note and you are done.

Once I get current I plan to print once a month and work forwards. 

Do any of you use Project Life?  Do you do more traditional scrapbooking?  The only thing I haven't figured out is what to do once B2 gets here.  Do I make two books, one for each kiddo?  Hmmmm...

Related Posts Plugin for WordPress, Blogger...